How to Register for Self Assessment — Step-by-Step With Screenshots
If you've recently started working for yourself — whether as a freelancer, sole trader, or landlord — one of the very first things you need to do is register for Self Assessment with HMRC. It sounds daunting, but the process is actually quite straightforward once you know where to click. This guide walks you through each step, so there are no surprises along the way.
Why You Need to Register for Self Assessment
Self Assessment is the system HMRC uses to collect Income Tax from people whose tax isn't automatically deducted through PAYE. If you earn money outside of a regular employment arrangement — from self-employment, rental income, or certain other sources — you'll almost certainly need to file a Self Assessment tax return each year.
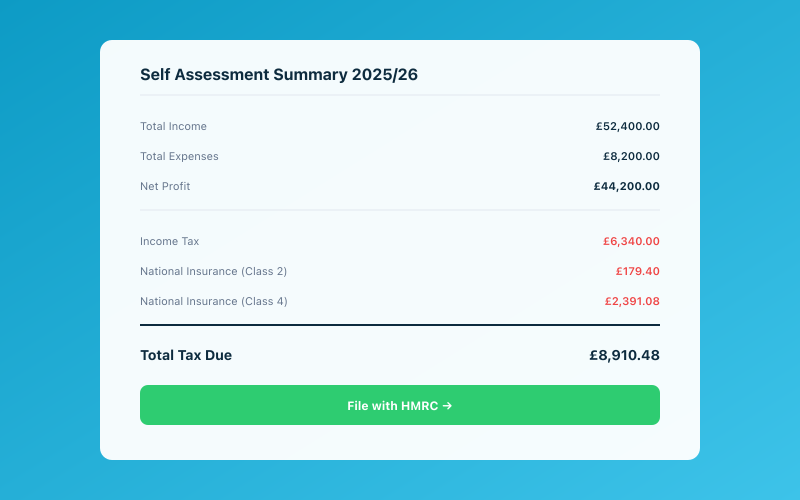 Your Accounted dashboard shows your real-time tax position
You're required to register if any of the following apply:
- You're self-employed as a sole trader and earned more than £1,000
- You're a partner in a business partnership
- You have untaxed income, such as rental income or investment income above certain thresholds
- You need to claim certain tax reliefs
- Your total income exceeds £150,000
Failing to register on time can land you with a penalty, so it's worth getting it sorted as soon as you start trading. HMRC expects you to register by 5 October following the end of the tax year in which you started your business. For example, if you started trading in June 2026, you'd need to register by 5 October 2027 at the latest — though registering sooner is always better.
For a broader overview of the whole registration process, have a look at our guide on how to register as self-employed with HMRC.
Before You Start — What You'll Need
Before you sit down to register, gather the following so the process goes smoothly:
- Your National Insurance number. You'll find this on payslips, a P60, or any letter from HMRC or DWP.
- Your personal details. Full name, date of birth, current address, and phone number.
- Your business details. The name of your business (if different from your own name), the nature of your work, your business address, and the date you started (or plan to start) trading.
- A Government Gateway account. If you don't already have one, you'll create it during the registration process. You'll need an email address for this.
It's also handy to have your passport or driving licence nearby, as HMRC may use these for identity verification.
Step 1 — Go to the HMRC Registration Page
Head to the GOV.UK website and search for "register for Self Assessment" or navigate directly to the Self Assessment registration page. You'll see a green "Start now" button — click it.
The page will ask you to confirm why you need to file a return. For most people reading this, you'll select "You are self-employed" or "You are a sole trader." If you're registering because of rental income or partnership income, choose the relevant option instead.
This first screen is simply about routing you to the correct registration form. Don't overthink it — just select the option that best describes your situation.
Step 2 — Sign In or Create a Government Gateway Account
After clicking through, you'll be asked to sign in using your Government Gateway user ID and password. If you've dealt with HMRC online before (for example, through PAYE or a previous tax return), you may already have these credentials.
If you don't have a Government Gateway account, select "Create sign in details." You'll need to provide:
- Your full name
- An email address (you'll receive a confirmation code)
- A password of your choosing
Once you've created your account, make a note of your Government Gateway user ID — you'll need it every time you log in to deal with HMRC online, including when you eventually file your tax return. Keep it somewhere safe.
Step 3 — Verify Your Identity
HMRC needs to confirm you are who you say you are. You'll be asked a series of identity verification questions. These typically involve details from your:
- UK passport
- UK driving licence
- Most recent payslip or P60
- Credit reference information (questions about financial accounts in your name)
This step can feel a bit intrusive, but it's a standard security measure. If you get stuck — for example, if you don't have a passport or driving licence — HMRC offers alternative verification methods, though these can take longer.
Once verified, you'll be taken back to the registration form.
Step 4 — Complete the SA1 (or CWF1) Form
Here's where the actual registration happens. The form you see depends on your circumstances:
- CWF1 is for individuals registering as self-employed (sole traders). This is the most common one.
- SA1 is for people who need to file a return but aren't self-employed — for instance, landlords with rental income or people with capital gains to declare.
For the CWF1 form, you'll enter:
- Your personal details — name, address, date of birth, National Insurance number
- Your business details — including the name you trade under, the type of work you do (HMRC has a list of trade classifications — just pick the closest match), and the date you started trading
- Your business address — this can be your home address if you work from home
- Your accounting date — most sole traders use 5 April to align with the tax year, which keeps things simpler
You'll also be asked whether you expect your turnover to exceed the VAT threshold (currently £90,000). If it does, you'll need to register for VAT separately, but for now just answer honestly.
Take your time with each field. If you're not sure about something — like your exact trade classification — it's better to pick the closest option and move on than to stress about getting it perfect. HMRC won't reject your registration over a minor classification choice.
Step 5 — Submit and Wait for Your UTR
Once you've completed and submitted the form, you'll receive an on-screen confirmation. Make a note of the date you submitted, as well as any reference numbers provided.
HMRC will then send you a Unique Taxpayer Reference (UTR) number by post. This is a 10-digit number that identifies you for Self Assessment purposes. You'll need it every time you file a return.
The UTR letter typically arrives within 10 working days if you're in the UK (or 21 days if you're abroad). If it hasn't arrived after three weeks, it's worth calling HMRC's Self Assessment helpline to chase it up.
Once you have your UTR, you can activate your Self Assessment account online using your Government Gateway credentials. HMRC will send you an activation code — again by post — which you'll enter online to complete the setup.
Yes, it does involve a lot of waiting for letters. HMRC is nothing if not fond of the Royal Mail.
Step 6 — Set Up Your Records From Day One
Now that you're registered, you'll need to keep records of your income and expenses throughout the tax year. This is where many new sole traders stumble — not because the work is hard, but because it's easy to let it pile up.
From the day you register, start tracking:
- Every invoice you send and every payment you receive
- All business expenses, with receipts
- Mileage for business travel
- Any use-of-home costs if you work from home
This is where a tool like Accounted can make life significantly easier. Rather than wrestling with spreadsheets or shoeboxes of receipts, you can log income and expenses as they happen. Penny, the AI assistant built into Accounted, can even help categorise your transactions automatically — which means less guesswork when your tax return is due.
If you want a more detailed walkthrough of the registration process itself, our step-by-step guide to registering as self-employed covers additional nuances that can help.
Common Mistakes to Avoid
A few pitfalls that trip people up during registration:
- Waiting too long. Register as soon as you start trading, not at the end of the tax year. Late registration can mean penalties.
- Losing your Government Gateway details. Write them down or store them in a password manager. Recovering access is possible but time-consuming.
- Forgetting about payments on account. Once you're registered and file your first return, HMRC may ask you to make payments on account — advance payments towards next year's tax bill. This catches many people off guard.
- Not keeping records immediately. Don't wait until January to start organising your finances. Start from day one.
What Happens After Registration?
Once you're fully set up, your main obligation is to file a Self Assessment tax return each year by 31 January following the end of the tax year. For the 2025/26 tax year (running 6 April 2025 to 5 April 2026), your return would be due by 31 January 2027.
You'll also need to pay any tax owed by the same deadline. If you owe more than £1,000 in tax, HMRC will usually set up payments on account, which means you'll also have a payment due on 31 July.
With Making Tax Digital for Income Tax rolling out from April 2026 for those earning over £50,000, it's more important than ever to keep your digital records in order. Having your bookkeeping sorted in a tool like Accounted means you're already ahead of the curve when quarterly reporting becomes mandatory.
Related reading:
- How to Register as Self-Employed With HMRC
- Register Self-Employed — Step-by-Step Guide
- Personal Allowance — How to Use It Effectively
Accounted helps UK sole traders stay on top of their bookkeeping and tax. Start your free 30-day trial at getaccounted.co.uk
Related Reading
Start your free trial and let Penny handle your bookkeeping automatically.
Accounted files your Self Assessment directly to HMRC, with your return pre-populated from your records. See Self Assessment filing →
Tax & Compliance Specialists
Our tax specialists have decades of combined experience in UK sole trader and small business taxation, MTD compliance, and HMRC submissions. All content is reviewed against current HMRC guidance before publication and updated quarterly to reflect legislative changes.
Ready to try Accounted?
Join UK sole traders who are simplifying their bookkeeping and tax.
Start your 14-day free trial